F5 Public Cloud Solutions > 6. Welcome to F5 Agility 2018 – Secure BIG-IP and Application deployments in AWS documentation! > 6.2. Securing your BIG-IP instance in AWS and deploying SSL App Source | Edit on
6.2.3. Setting up Hackazon Virtual Server
We will now setup an SSL Offload Virtual Server using the Cipher Group previously configured.
Go to the F5 Admin page and select Local Traffic -> Profiles -> SSL -> Client
Click on Create
For the SSL profile name Enter hackazon-clientssl.prf
Select Advanced configuration.
Select the checkbox to modify Ciphers and select Cipher Group and in the dropdown select hackazon-ciphergroup that you created.
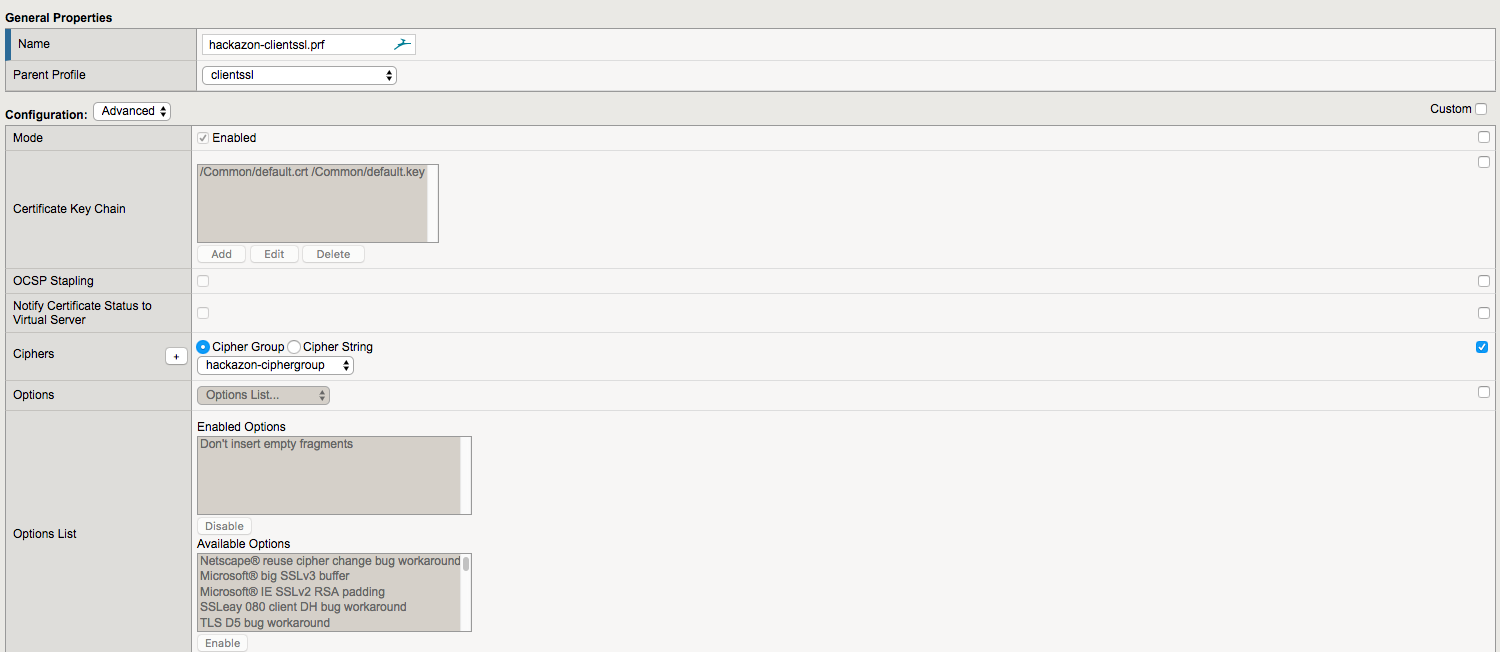
Leave other options as default and click on Finished
Go to Local Traffic -> Pools
Click on Create
In the Pool Name field enter hackazon.p
Select the HTTP health monitor and move it to Active
Put in the following two IP addresses into the list of pool members both on port 80: 18.205.1.169, and 34.239.240.82
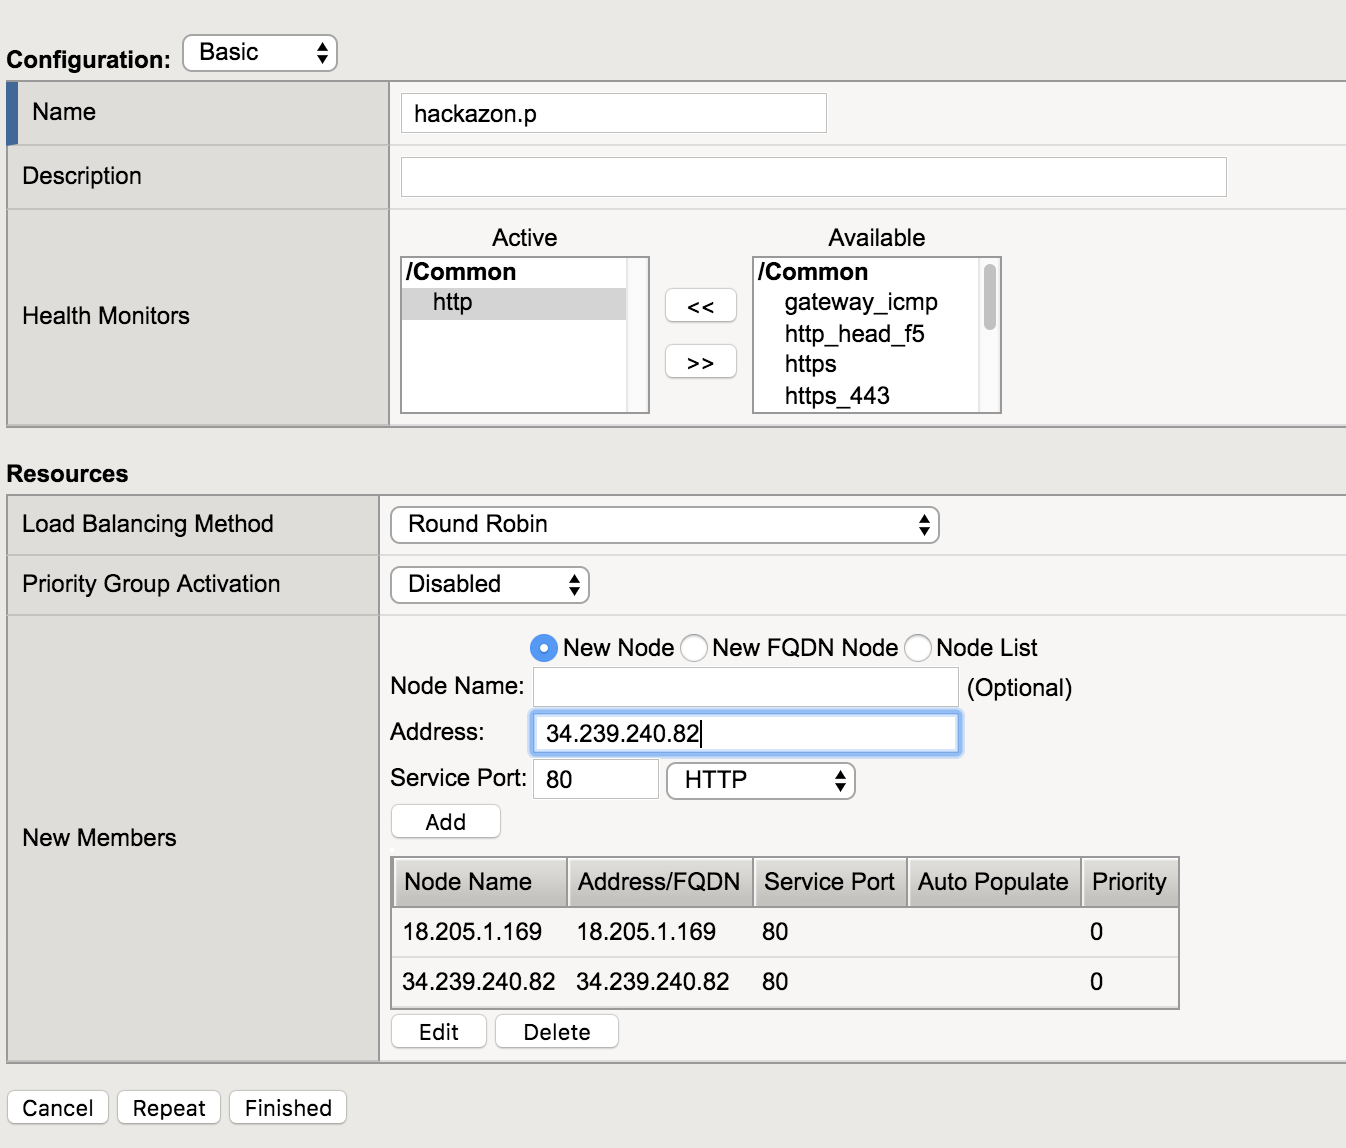
Click on Finished
Go to the AWS console, Select Services and then EC2. Select Instances Filter for your
student#and select the checkbox for the one labeled BIG-IP:Student#-CFT.In the description for the instance there is a list of Elastic IPs. Click on the last one in the list. It will also not have a * at the end of the IP address.
In the definition of the Elastic IP there will be a Private IP address. This IP will become your Virtual Server Destination address. The Elastic IP will be the IP for accessing the application.

This screenshot illustrates one example. The presented IP addresses will not be the ones you see
Go to F5 Admin page and then Local Traffic -> Virtual Servers
Click on Create
Enter a Virtual Server Name of hackazon_vs
In the Destination Address field enter Private IP address that you determined earlier as part of the Elastic IP information.
For Service Port enter 443
For HTTP Profile select HTTP from the dropdown menu.
In the SSL Profile (client) field move hackazon_clientssl.prf from Available into Selected
In the Source Adress Translation select Automap
In the Resources section under Default Pool select hackazon.p from the dropdown list.
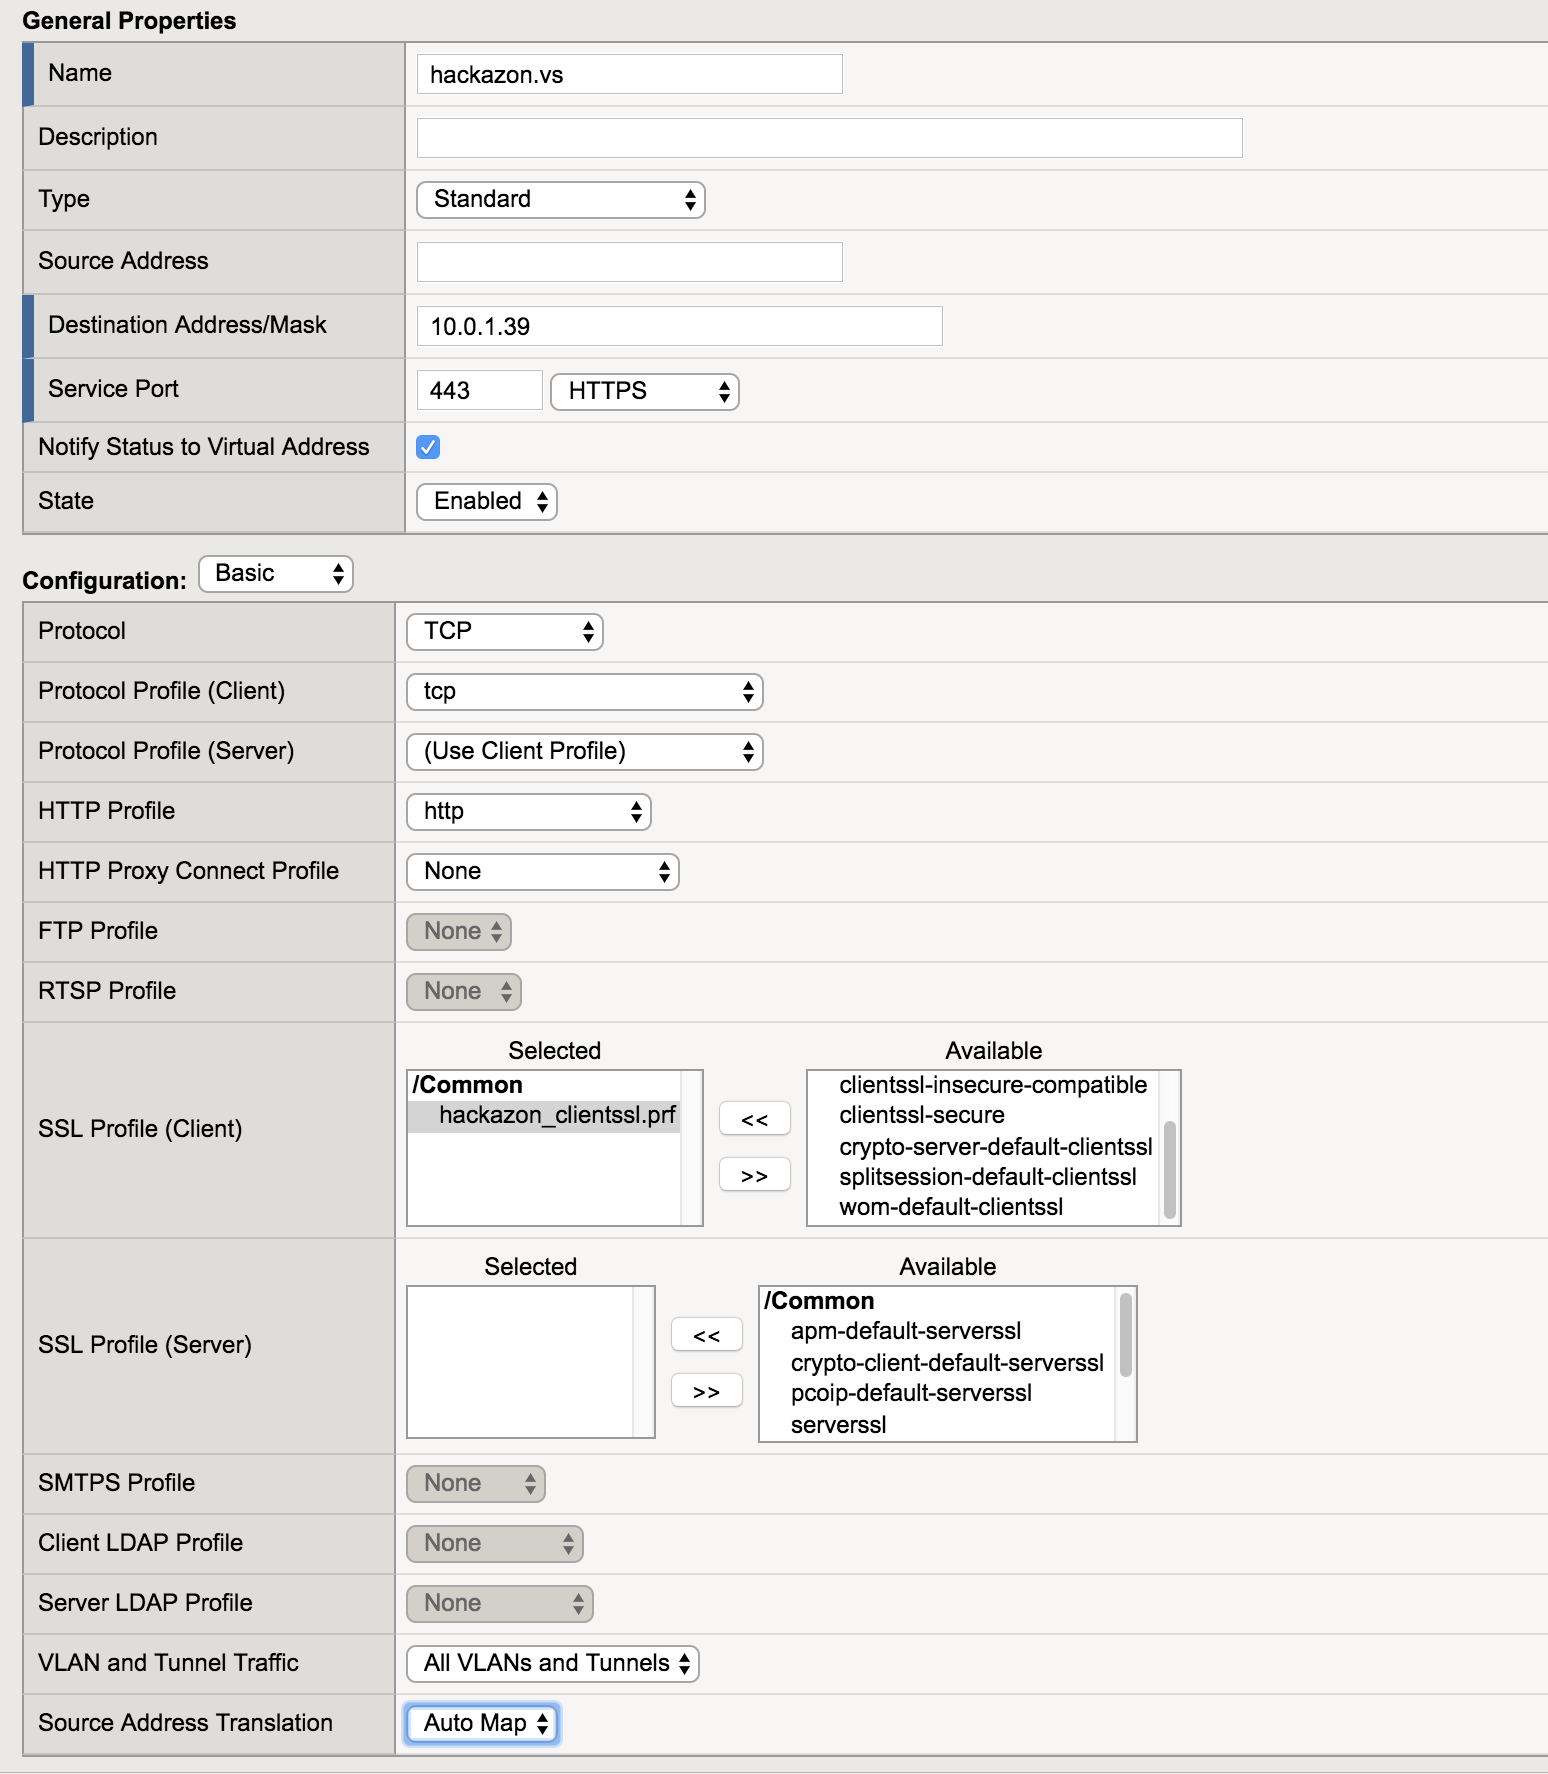
Click on Finished
Now take the Elastic IP you found earlier in the AWS Console, open a web browser and go to https://<Elastic IP>. You will get a certificate error because we are not using a domain specific SSL Certificate. Once ignoring the certificate error you should start seeing the hackazon web page.