F5 Public Cloud Solutions > 7. Protecting Cloud Native Applications > 7.1. BIG-IP LTM Configuration Source | Edit on
7.1.1. Basic Configuration
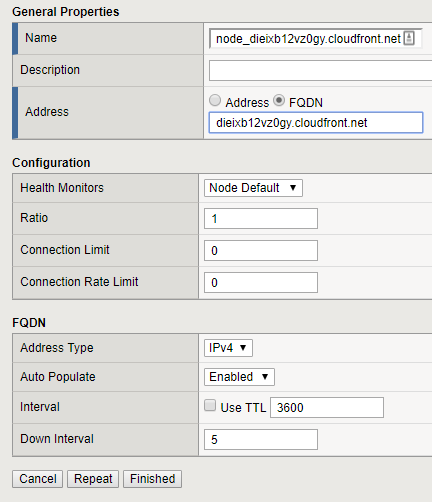
7.1.1.1. Create Nodes
There is a limitation when creating pool members using FQDN. If your CLoudFront url start with a number, TMOS does not accept the auto-generated object name. To avoid this issue, create a node with a specific a name.
To get your Target Domain Name, open the “Target Domain Names.txt” file located at the Windows desktop.
“Go to Local Traffic > Nodes > Nodes List” and click “Create”
Name: node_YOUR-TARGET-DOMAIN_NAME (e.g.: node_dieixb12vz0gy.cloudfront.net)
We got this information on step 1.
Auto Populate: Enable
Select FQDN in Address and fill with your YOUR-TARGET-DOMAIN_NAME
Click Finished
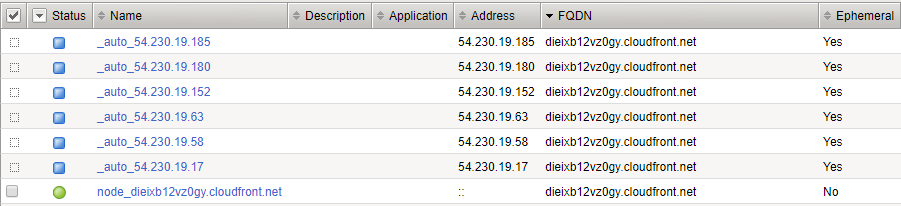
Nodes related to this FQDN (ephemeral) will be automatically generated.
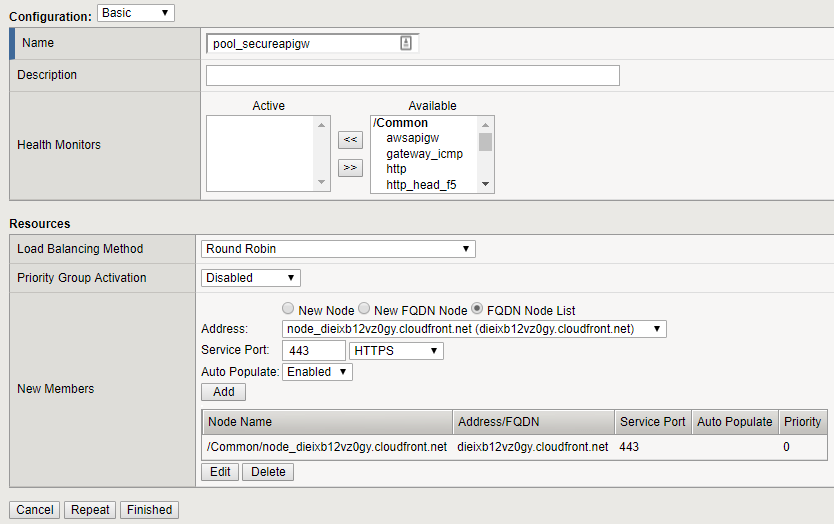
7.1.1.2. Create Pool
Go to “Local Traffic > Pool > Pool List” and click “Create”
Name: pool_secureapigw
For this lab we will not apply a monitor to this pool.
Select “FQDN Node List”
Address: Select the node you created in the previous task.
Service Port: 443 (API GW does not support unencrypted traffic)
Click Add
Click Finished